General Settings
Process Objective#
General Settings enable admin to update default EULA and more general settings.
Overview#
General Settings enable admin to manage important things about user-developer relationship, such as EULA, user terms, email settings, link to privacy policy and other general settings.
Features and Functionality#
Here is the Update General Settings interface:
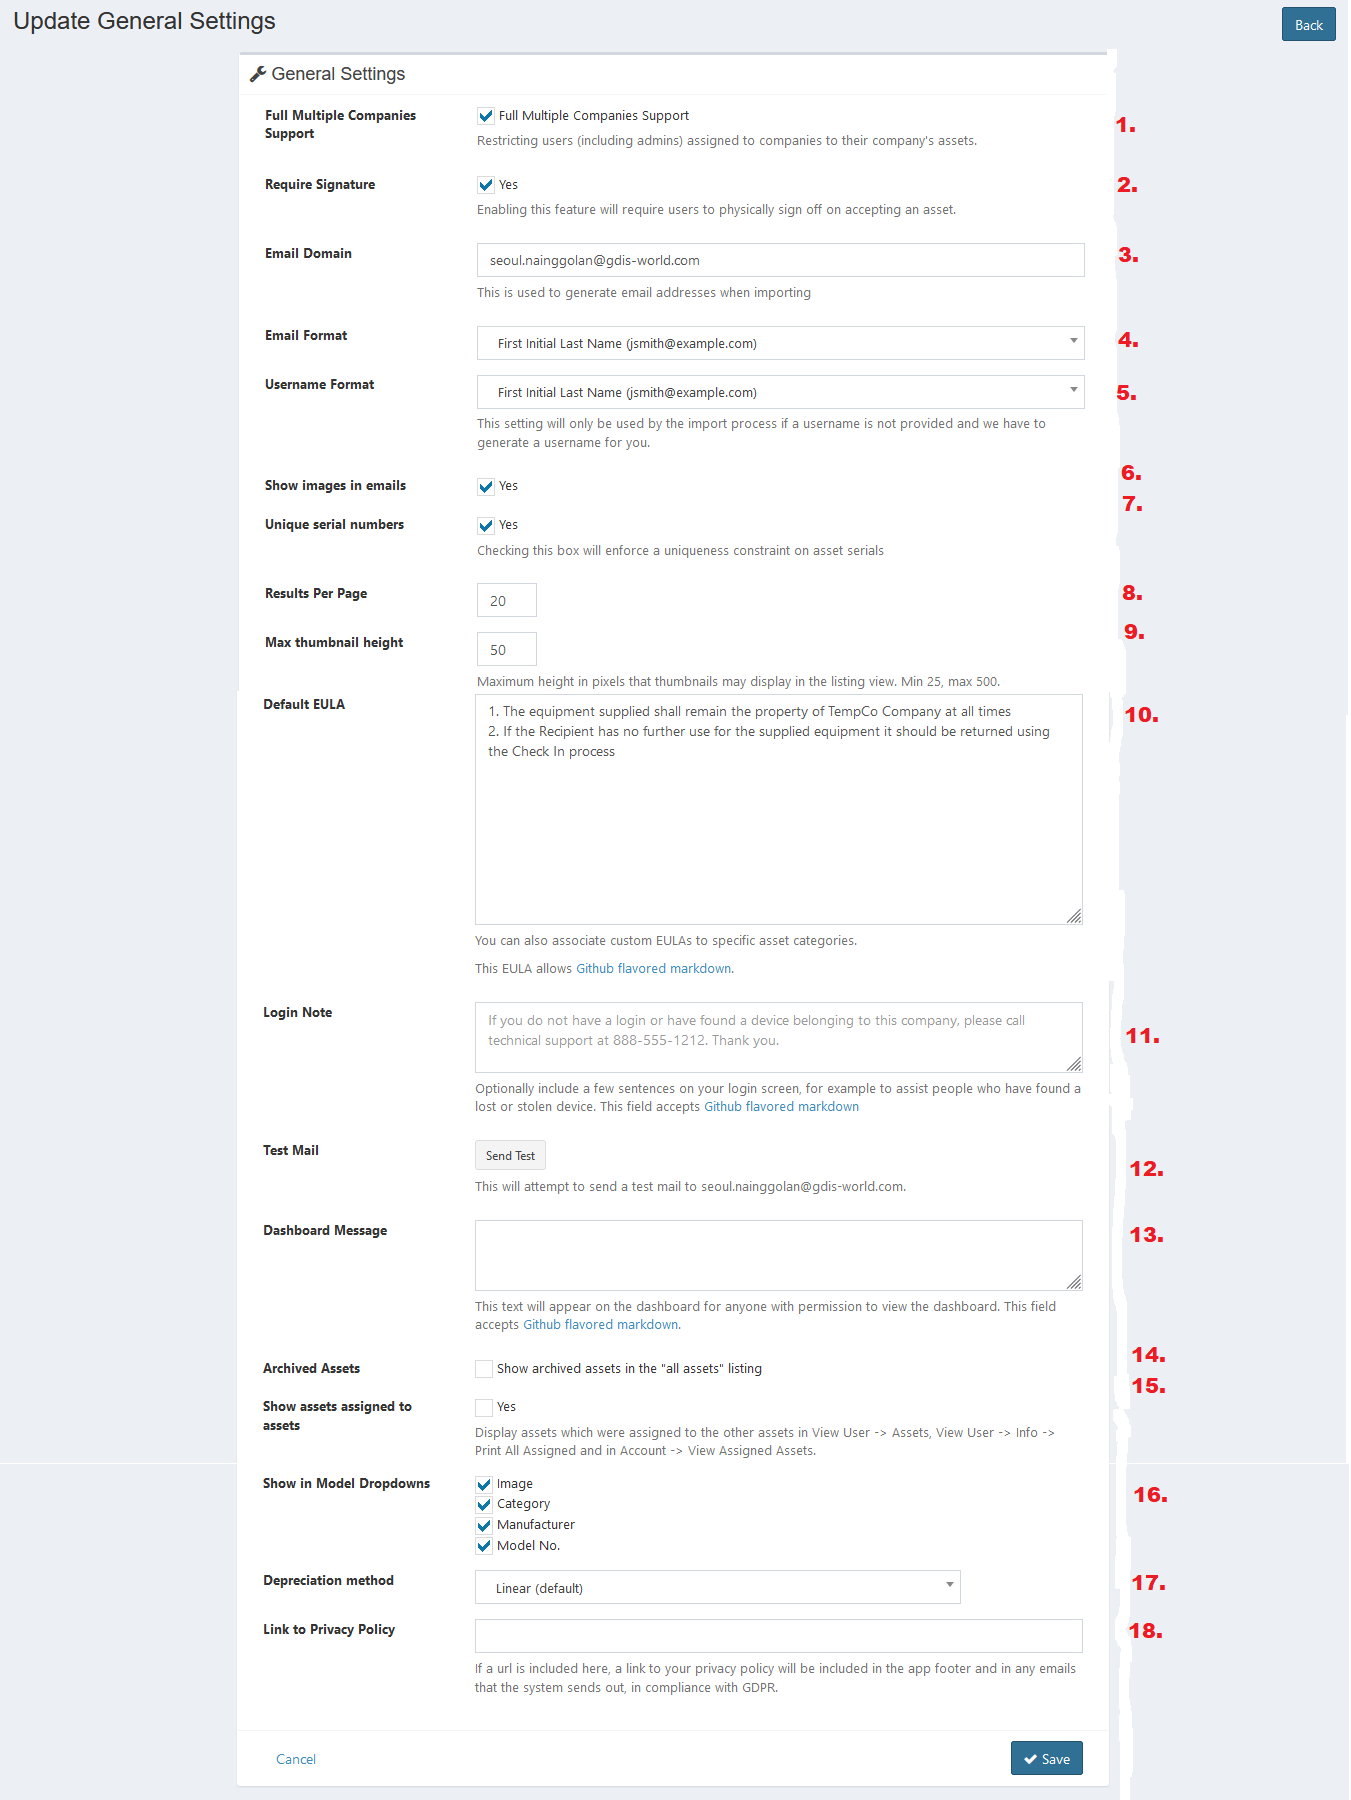
- Check the checkbox to allow full multiple companies support. It restricts users (including admins) assigned to companies to their company's assets.
- Check the checkbox to enable require signature. Enabling this feature will require users to physically sign off on accepting an asset.
- Enter email domain. This is used to generate email addresses when importing.
- Select email format.
- Select username format. This setting will only be used by the import process if a username is not provided and we have to generate a username for you.
- Check the checkbox to enable system to show asset images in email.
- Check the checkbox to enforce a uniqueness constraint on asset serials.
- Enter result per page.
- Enter max thumbnail height. Maximum height in pixels that thumbnails may display in the listing view. Min 25, max 500.
- Enter default EULA. You can also associate custom EULAs to specific asset categories.
- Enter login note. Optionally include a few sentences on your login screen, for example to assist people who have found a lost or stolen device.
- Click the Send Test button to send a test mail to superadmin.
- Check the checkbox to enable system to show archived assets in the "all assets" listing.
- Check the checkbox to display assets which were assigned to the other assets in View User -> Assets, View User -> Info -> Print All Assigned and in Account -> View Assigned Assets.
- Check the checkbox to select what to show in model dropdowns.
- Select the depreciation method.
- Enter link to privacy policy. If a url is included here, a link to your privacy policy will be included in the app footer and in any emails that the system sends out, in compliance with GDPR.
- Click Save button to finish your record.
- Click Cancel button to cancel your record.
- Click Back button to go back to the previous page.